Custom Posters in your base: A tutorial
GenghisConnor Usa Join Date: 2016-08-25 Member: 221720Members
Usa Join Date: 2016-08-25 Member: 221720Members
Hey guys today Im gonna spread a little knowledge for friends here on this forum. Tired of the same 3 posters of a prawn suit and a kitty? Tired of looking at the ocean through picture frames when we have windows for that? NO LONGER today we'll spice up your relaxation quarters with a personal touch of your own. Custom picture frames! Most of this tutorial is editing pictures aspect ratios so if you can do that then cool. But if not, im detailing how to for the less tech savvy.
the first step is to of course, have scanned the frame or be in creative, with that out of the way let move on.
1. The picture frame is currently only 16:9 resolution, so whatever pictures you use will have to fit that format. pictures not close to 16:9 will have to be largely cropped to be as close as possible, then resized. If your desired pic fits this ratio then move on to 4
16:9 resolutions
320-180
640-360
720- 405
960 -540
1024-576
1280-720
1366-768
1600-900
1920 -1080
2048-1152
2560 -1440
If your picture fits one of these or is a 16:9 aspect ratio you can skip to step 5 now! if not, open up your pic of choice in paint.
We'll use this delightful guy. Time to open him in paint
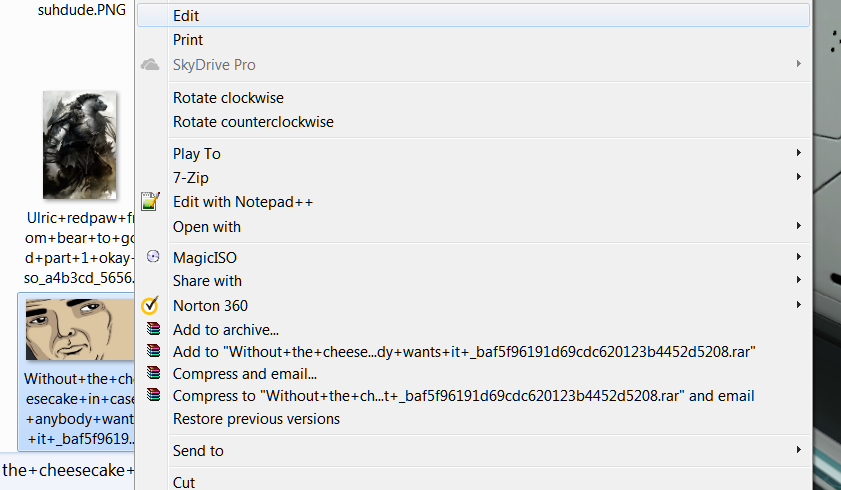
If you look at the bottom you see this
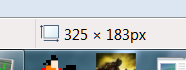
There's your dimensions.
on the picture I used its already fairly close to my goal of a 16:9 ratio.
2. crop your photo so that its closer to your target dimensions. example, if your pic is like 1980:1040 you could shoot for 1920:1080. or 1600:900. Use the list of resolutions above to help with this part. The goal in this step is that once we use the resize function, the picture will get stretched as little as possible.
3. Resizing
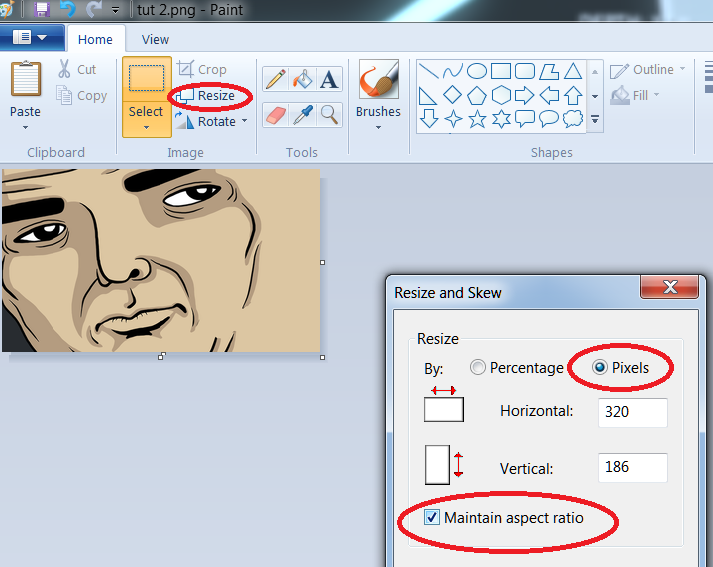
Click resize, click pixel instead of percentage, then uncheck 'maintain aspect ratio' Now you can set the exact dimensions of your picture. for me I only had to change it by a couple pixels each box, so I hardly noticed a difference.
Save it as JPEG
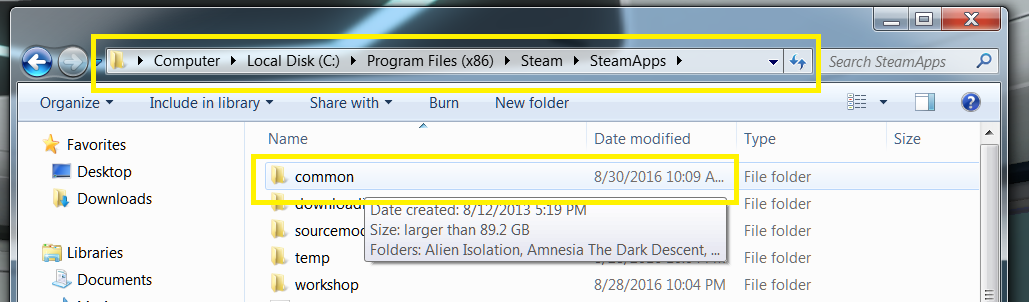
4. Drop it into your screenshots folder!
If you play through steam, look in Computer > Local disk C: >Program files > Steam > Steamapps > Common > subnautica
Snappdata > Saved games > whichever slot is yours > screenshots.
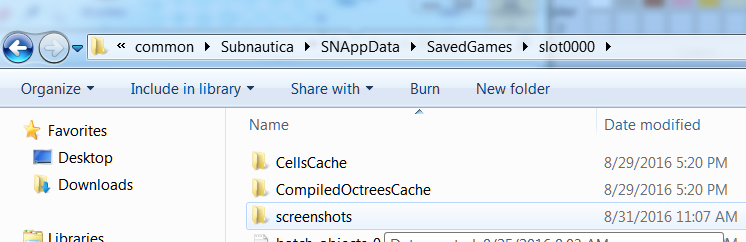
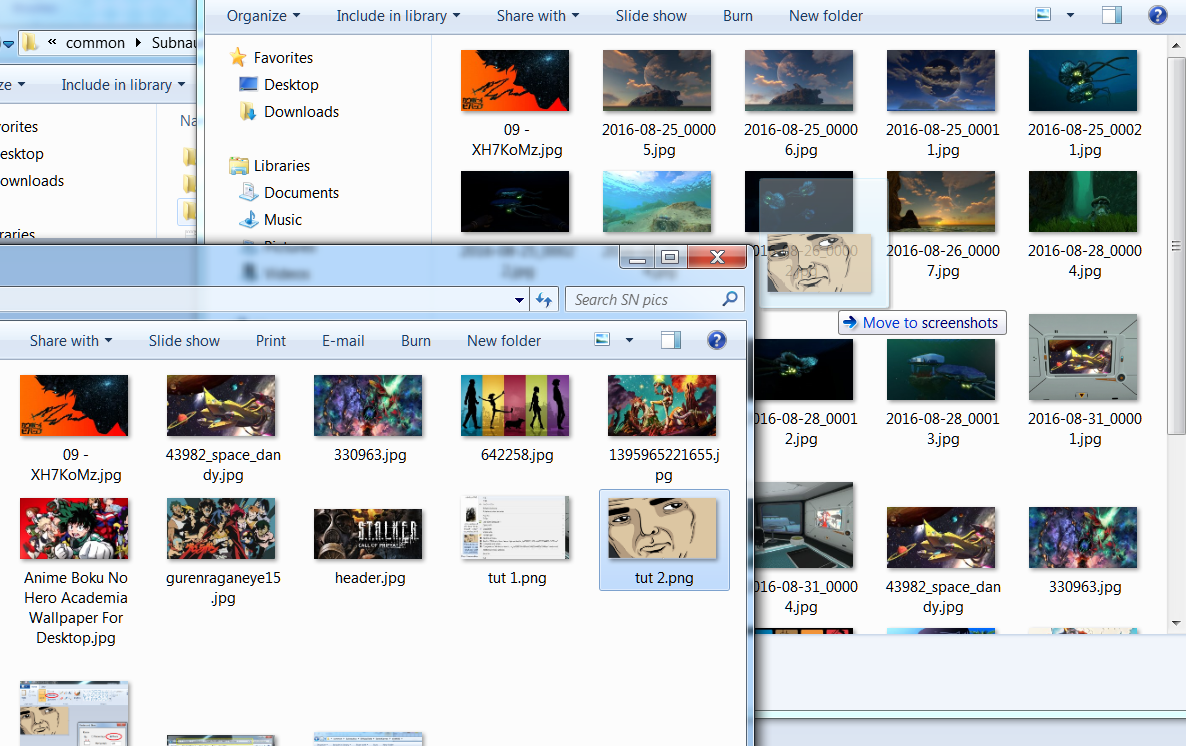
Then you should be able to put it on your pic frame the normal way
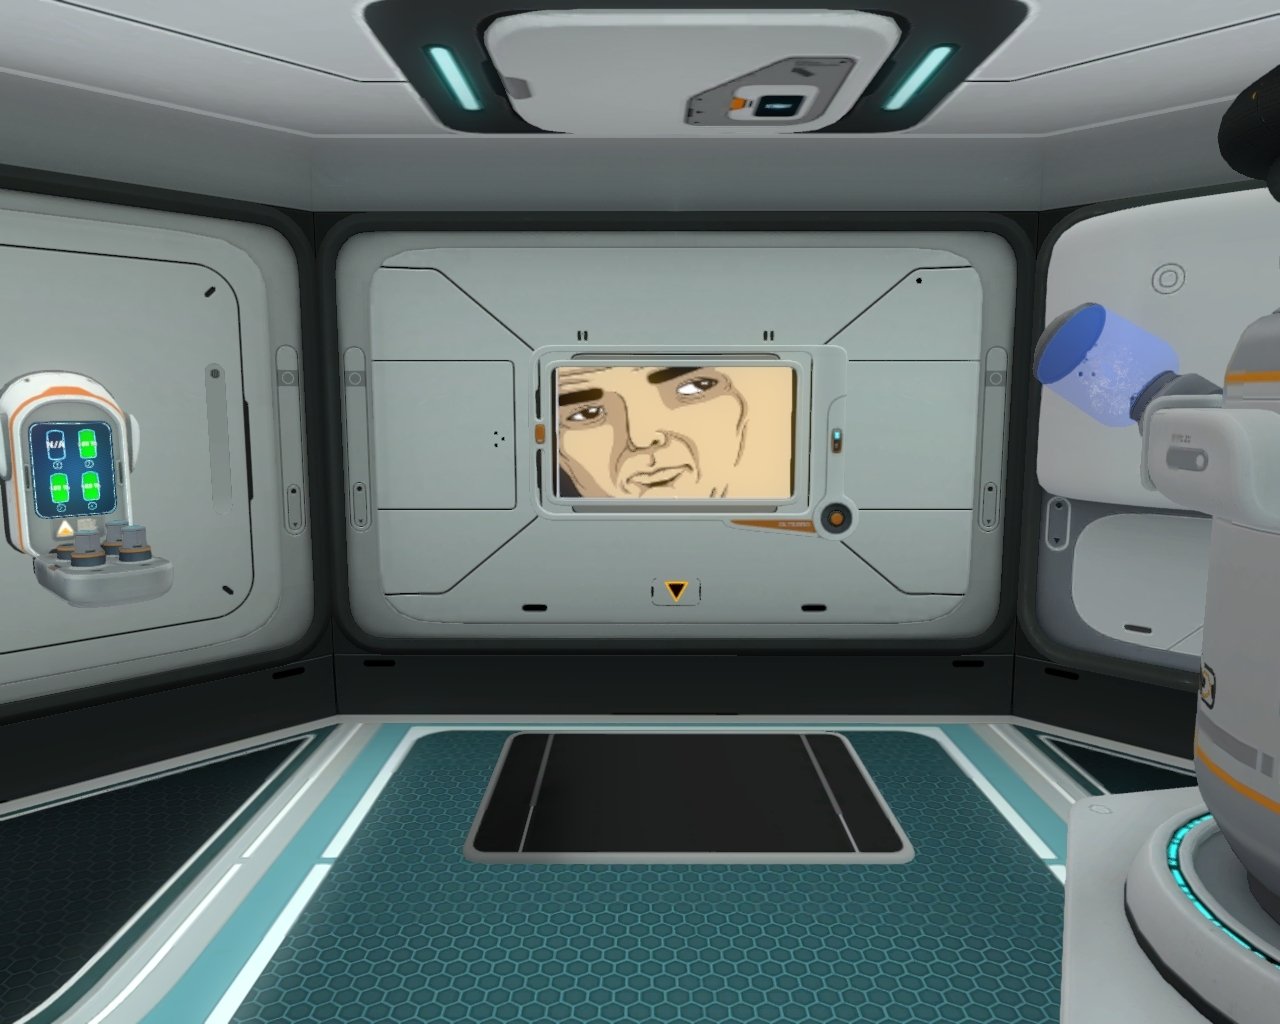
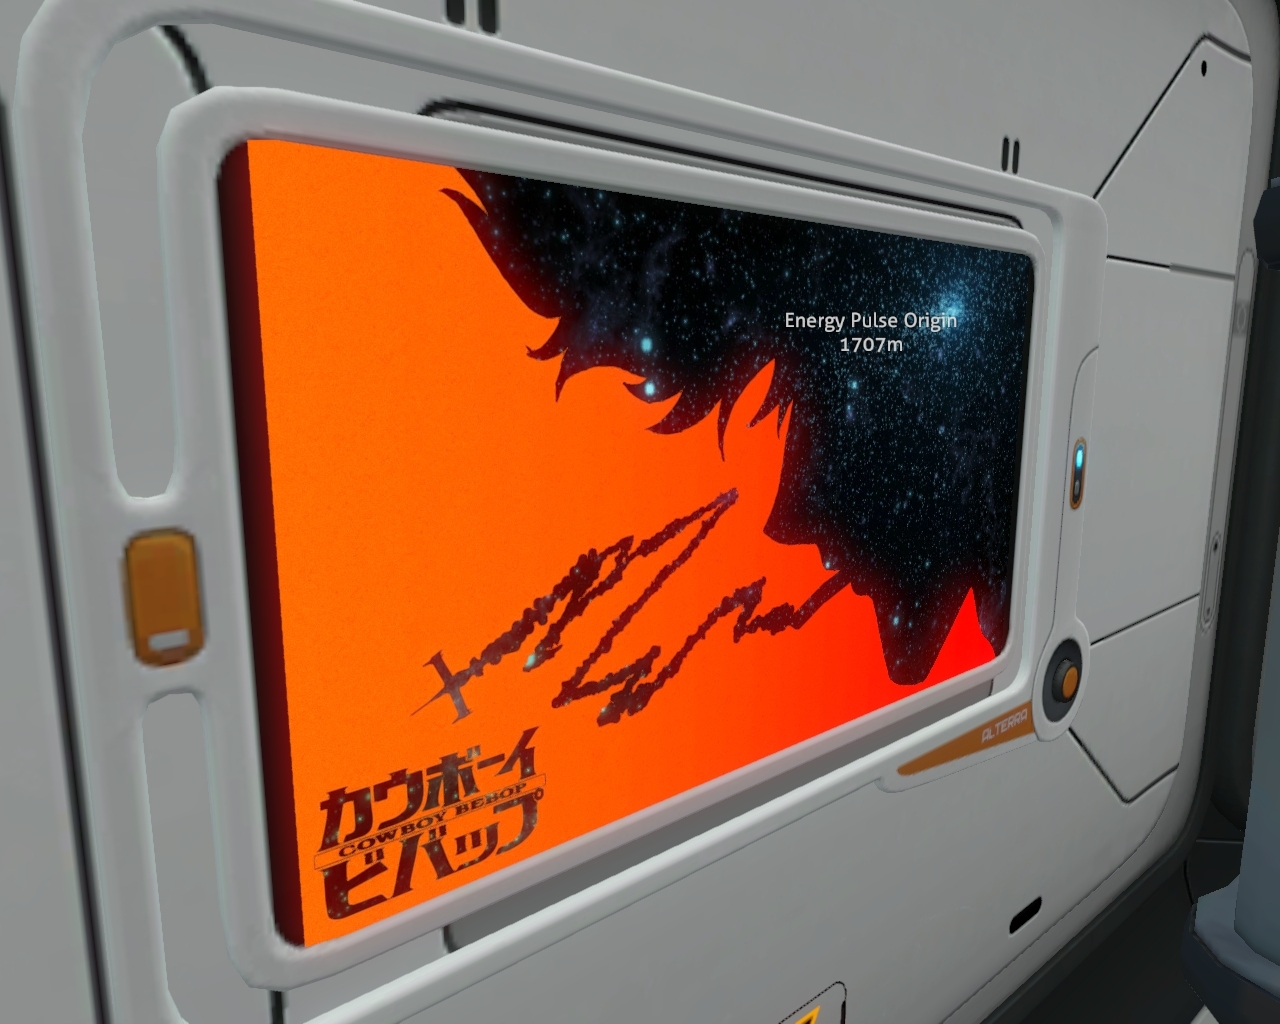
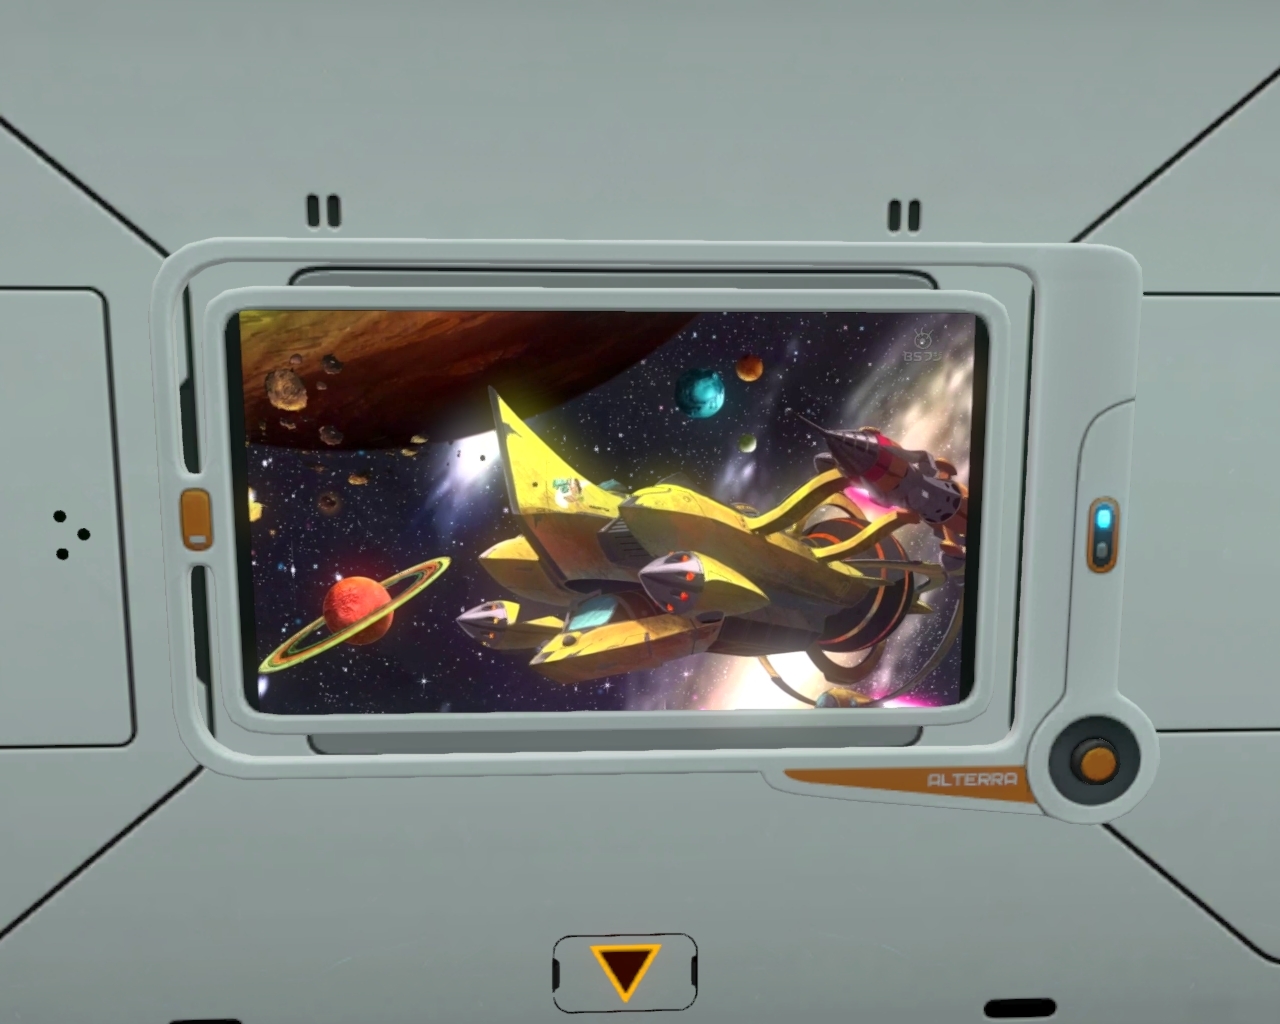
Im a huge nerd so I have anime posters everywhere but you could put in a picture of a place you've been, a pet or a family member. You're only limited by the 3rd dimension.
One final note, 4:3 pics will work too but they'll have big ugly black bars on the side, your call.
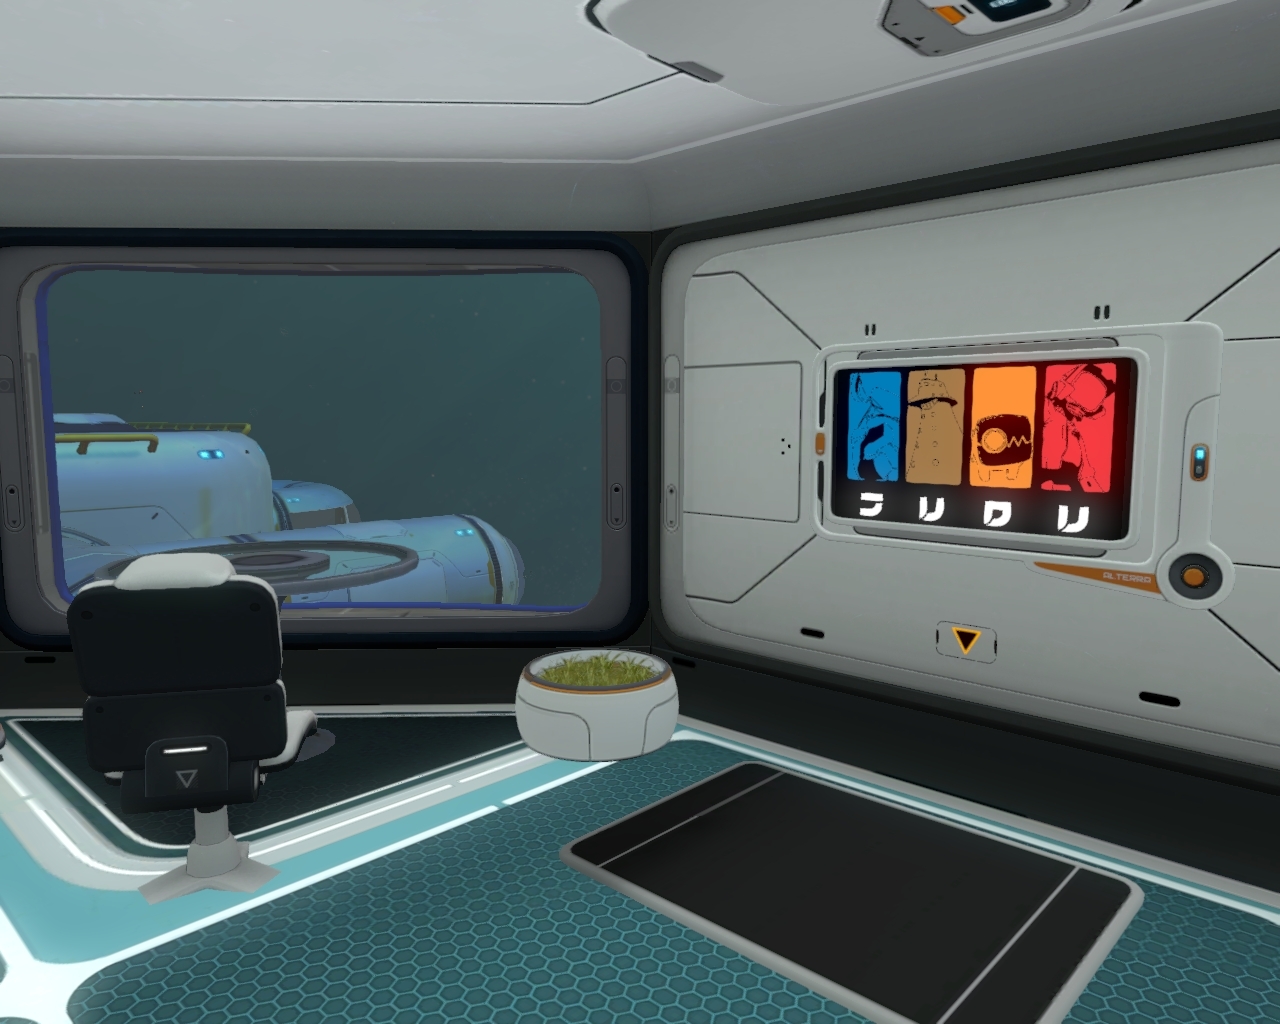
Now go trick out your sea domes!
the first step is to of course, have scanned the frame or be in creative, with that out of the way let move on.
1. The picture frame is currently only 16:9 resolution, so whatever pictures you use will have to fit that format. pictures not close to 16:9 will have to be largely cropped to be as close as possible, then resized. If your desired pic fits this ratio then move on to 4
16:9 resolutions
320-180
640-360
720- 405
960 -540
1024-576
1280-720
1366-768
1600-900
1920 -1080
2048-1152
2560 -1440
If your picture fits one of these or is a 16:9 aspect ratio you can skip to step 5 now! if not, open up your pic of choice in paint.
We'll use this delightful guy. Time to open him in paint
If you look at the bottom you see this
There's your dimensions.
on the picture I used its already fairly close to my goal of a 16:9 ratio.
2. crop your photo so that its closer to your target dimensions. example, if your pic is like 1980:1040 you could shoot for 1920:1080. or 1600:900. Use the list of resolutions above to help with this part. The goal in this step is that once we use the resize function, the picture will get stretched as little as possible.
3. Resizing
Click resize, click pixel instead of percentage, then uncheck 'maintain aspect ratio' Now you can set the exact dimensions of your picture. for me I only had to change it by a couple pixels each box, so I hardly noticed a difference.
Save it as JPEG
4. Drop it into your screenshots folder!
If you play through steam, look in Computer > Local disk C: >Program files > Steam > Steamapps > Common > subnautica
Snappdata > Saved games > whichever slot is yours > screenshots.
Then you should be able to put it on your pic frame the normal way
Im a huge nerd so I have anime posters everywhere but you could put in a picture of a place you've been, a pet or a family member. You're only limited by the 3rd dimension.
One final note, 4:3 pics will work too but they'll have big ugly black bars on the side, your call.
Now go trick out your sea domes!
Comments
Oh geez... I can just see someone pulling that and putting hentai imagery all over their base and showing it off *rollseyes*
I say this because whenever you delete a save game (such as when a patch makes it no longer viable) it deletes all screenshots and pictures that were in that directory with it. By having a separate achieve folder you can avoid the anguish of having your favorite stuff get erased forever.